 Pin It
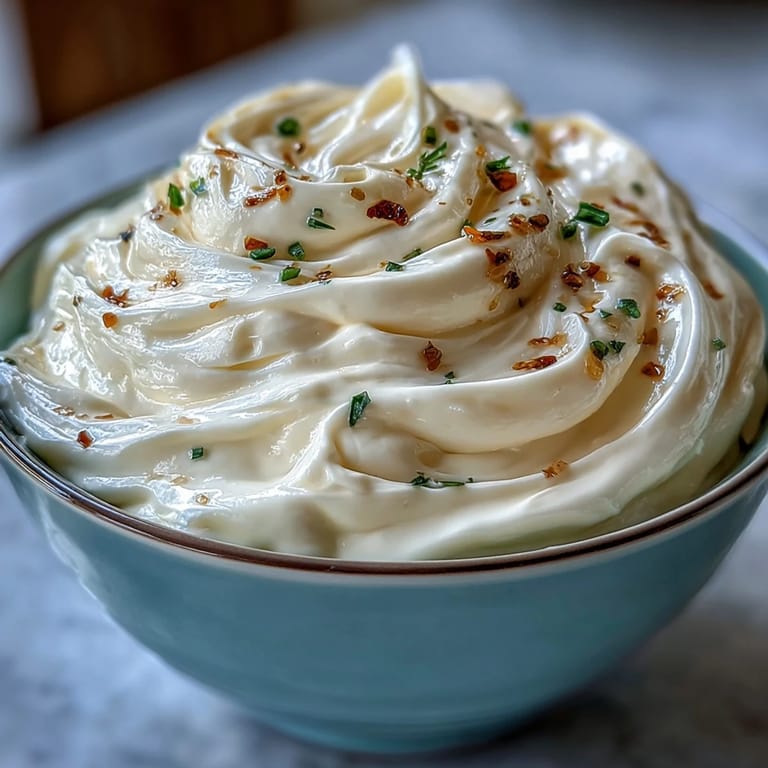
 The first time I made garlic aioli from scratch was late one summer evening, when I was craving something tangy and creamy to dip my just-cooked fries. The kitchen still smelled of crisp potatoes, and as I whisked the golden mixture, I was surprised at how the scent of raw garlic can wake up your senses. I hadn't planned on making mayo, but I had fresh eggs and a wedge of lemon sitting around, so it felt almost like fate. Somewhere between the steady stream of oil and the peppery kick, I realized this aioli was destined for more than just fries. The simple ingredients came together in a way that felt both luxurious and homey.
I remember whipping up this aioli for a lunch when my friend Andy insisted homemade mayonnaise was impossible. We laughed: my bowl skittered across the counter, and he doubted my arm could whisk fast enough. By the end, the kitchen echoed with our surprise when Andy dipped a carrot and declared it better than any restaurant version. That day, our skepticism turned into a little ritual—trying new dips each time we met. The aioli became a running joke: "Only your arms can make mayo!"
Ingredients
- Egg yolk: Room temperature helps guarantee a stable emulsion—I learned the hard way in winter.
- Dijon mustard: Provides tang and the emulsifying magic, plus a gentle spice that makes the aioli stand out.
- Lemon juice: Brightens up the flavor and cuts the richness; fresh is best for a clean zing that bottled juice can't match.
- Neutral oil (sunflower or canola): Keeps the aioli smooth and lets the garlic shine; avoid olive oil if you don't want bitterness.
- Garlic cloves: Minced or grated finely so they melt into the sauce—microplane is my tool of choice for extra punch.
- Sea salt: Draws out flavors and acts as a gentle preservative; a light touch can go a long way.
- Black pepper: Adds warmth and just enough kick to balance everything.
Tired of Takeout? 🥡
Get 10 meals you can make faster than delivery arrives. Seriously.
One email. No spam. Unsubscribe anytime.
Instructions
- Whisk the base:
- Gather your egg yolk, mustard, and lemon juice in a medium bowl, then start whisking until they meld into a pale, velvety mixture. You might notice a faint citrus scent and a soft resistance as the base thickens.
- Add the oil slowly:
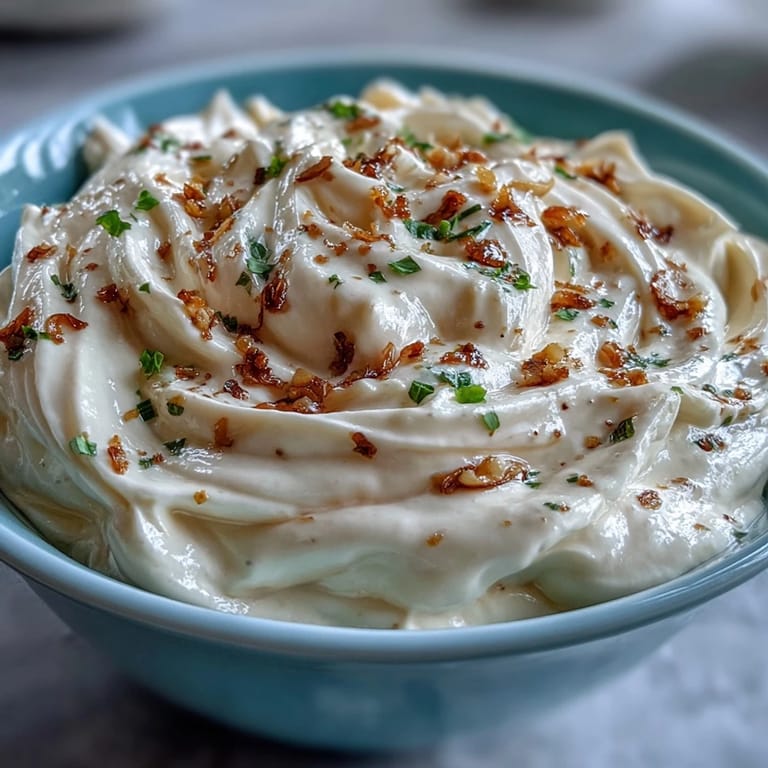
- Begin dribbling in oil—just a drop at a time at first—while whisking continuously; you'll hear the whisk gentle against the bowl and see the texture begin to gloss. Once it starts to thicken and emulsify, you can pour the oil in a slow, steady stream and whisk with vigor.
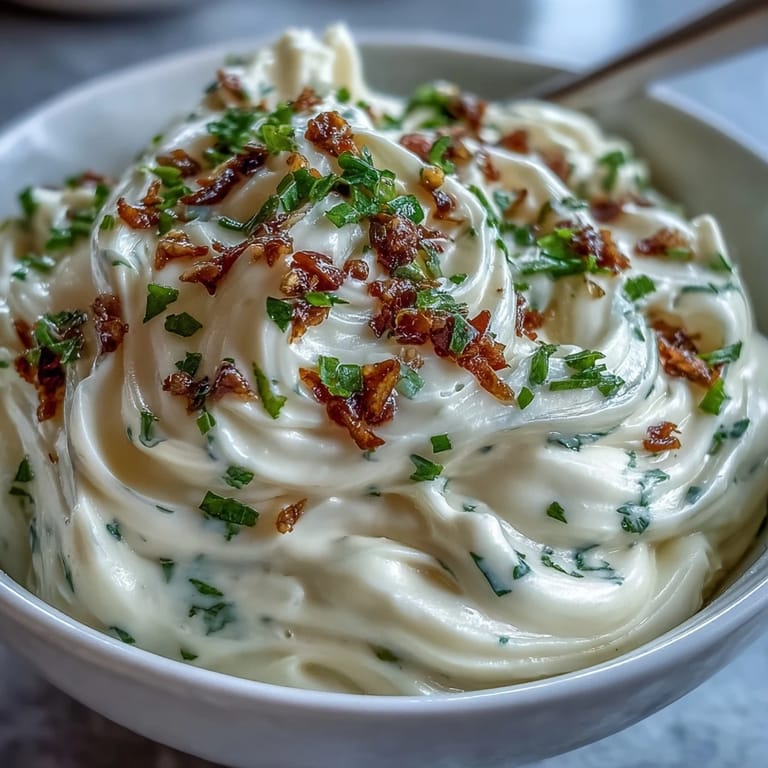
- Stir in garlic and seasonings:
- When your aioli is creamy and luscious, fold in the minced garlic, sea salt, and several grinds of pepper. The aroma will bloom instantly, sharpening the sauce and inviting a taste test.
- Final adjustments:
- Sample a spoonful and tweak the seasoning or squeeze in more lemon if needed—the flavors mellow after a few minutes. If you're satisfied, transfer the aioli to a jar or bowl and refrigerate for freshness, up to three days.
 Pin It
 Once, while prepping a picnic basket for an impromptu lakeside outing, this aioli turned the simplest sandwiches into something everyone wanted seconds of. The sunlight bounced off the water, and somehow the creamy garlic flavor became the star, more memorable than the view. Faces lit up after each bite, and soon we were making up reasons to try the aioli on everything—potato chips, grilled veggies, even fruit slices as a dare. Suddenly, it was no longer a condiment, but the center of shared laughter and unexpected tastes. That afternoon, aioli felt like an invitation to play with food and enjoy every moment.
How To Keep Your Aioli Fresh
If you're storing leftovers, make sure your jar is scrupulously clean and airtight—any stray crumbs or moisture can spoil the batch quickly. The flavors deepen overnight, but the garlic gets sharper, so taste before serving if it's been refrigerated.
Making Vegan Aioli—My Attempts
One rainy day, I subbed chickpea aquafaba for the egg yolk and leaned in on the mustard to help emulsify; my first vegan batch was less creamy but still packed with garlic flavor. It took some extra whisking, and a dash of smoked paprika made it feel vibrant and satisfying.
Creative Ways To Serve Garlic Aioli
The easiest win is as a dip for crispy oven fries, but I've had fun swirling aioli into roasted veggie platters or slathering it on grilled fish wraps for a quick Mediterranean vibe. A touch of chopped fresh herbs or roasted garlic transforms the sauce and keeps each batch interesting. I even tried spreading it on toast for brunch, which was unexpectedly addictive.
- Let your aioli sit a few minutes before serving so the flavors mellow.
- Start with one garlic clove and add more to taste—raw garlic can overpower if you're not careful.
- Always whisk by hand at first; electric mixers can cause the oil to split faster.
 Pin It
 Garlic aioli has become my go-to, ready in ten minutes and always able to make ordinary meals feel special. Making it together—or solo—never gets old, and I hope your bowl brings as much joy and flavor to your table.
Recipe Questions & Answers
- → What oil works best for garlic aioli?
Neutral oils like sunflower or canola ensure a silky texture and mild flavor, letting garlic shine.
- → Can I use roasted garlic instead of raw?
Roasted garlic gives a gentler, sweeter flavor to aioli. Try both to find your preferred taste.
- → How do I achieve a creamy texture?
Slowly add oil while whisking to properly emulsify the mixture and create a glossy, thick aioli.
- → Is garlic aioli suitable for vegetarians?
This aioli is vegetarian and gluten-free. For vegan, swap egg yolk with aquafaba and adjust mustard.
- → How long can I store homemade aioli?
Store garlic aioli in the refrigerator, covered, for up to three days. Stir before serving for best texture.
- → Can I add herbs or spices?
Enhance aioli with chopped herbs or smoked paprika for extra flavor and colorful presentation.