 Pin It
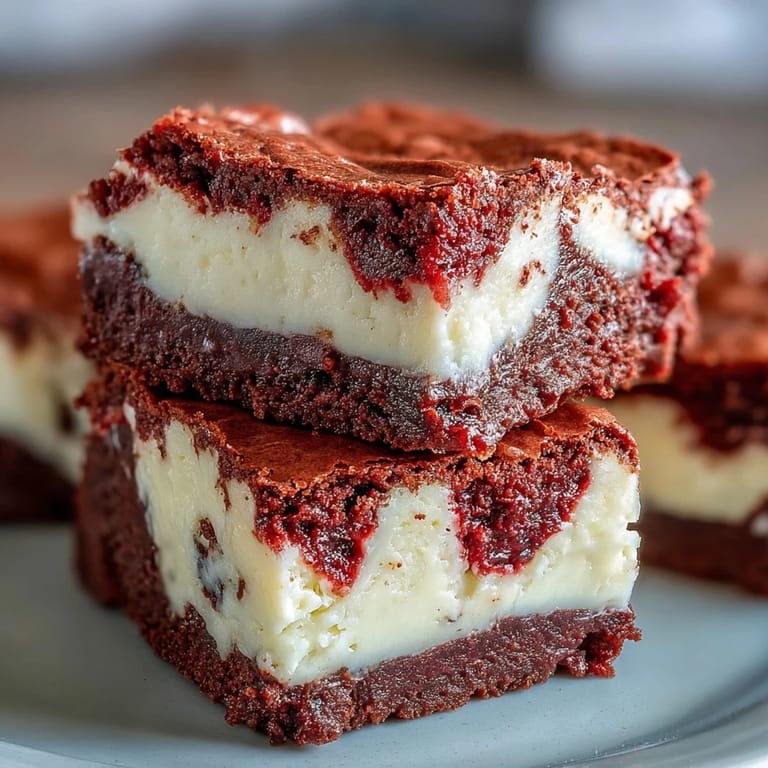
 The kitchen smelled like butter and cocoa, and I was knee-deep in red batter when my neighbor knocked on the door. She peeked in, saw the swirl of crimson and cream cheese, and asked if I was making art or dessert. Honestly, it felt like both. Red velvet brownies with a cheesecake ribbon had been on my mind for weeks, ever since I saw a photo in a magazine and decided I could do better. That first batch came out lopsided and overbaked, but the flavor was unforgettable.
I brought these to a potluck once, stacked in a glass container with parchment between the layers. My friend's daughter, who claimed she hated brownies, ate three squares and asked if I'd teach her how to make them. We spent the following Saturday in my kitchen, red food coloring staining our fingertips, laughing every time the batter looked more like paint than dessert. She still texts me photos whenever she bakes a batch, and I love that this recipe became something we share.
Ingredients
- Unsalted butter (115 g, melted): Use real butter, not margarine, because the richness it brings is irreplaceable, and melting it slowly prevents any graininess in the batter.
- Granulated sugar (250 g total): Split between the brownie and cheesecake layers, it balances the cocoa bitterness and keeps the cream cheese from tasting too savory.
- Large eggs (3 total, room temperature): Cold eggs can seize up the batter, so I set mine on the counter while I gather everything else, and they blend in beautifully.
- Vanilla extract (1.5 tsp total): A little goes into each layer, and I always use pure extract because the imitation stuff tastes flat next to cream cheese.
- Red food coloring (1 tbsp): Gel works best for vibrant color without adding extra liquid, and I've learned that a little more never hurts if you want that dramatic look.
- All-purpose flour (60 g): Just enough to give structure without making the brownies cakey, and sifting it with the cocoa prevents lumps.
- Unsweetened cocoa powder (20 g): This deepens the chocolate flavor and keeps the red velvet from tasting like vanilla cake in disguise.
- Salt (1/4 tsp): A small amount sharpens every other flavor, especially the cocoa, and I never skip it even when I forget to write it on my grocery list.
- Cream cheese (225 g, softened): Let it sit out for at least an hour so it beats smooth without lumps, because nobody wants chunks of cold cheese in their swirl.
Tired of Takeout? 🥡
Get 10 meals you can make faster than delivery arrives. Seriously.
One email. No spam. Unsubscribe anytime.
Instructions
- Preheat and prep your pan:
- Set your oven to 175°C (350°F) and line an 8x8-inch pan with parchment, leaving extra hanging over the sides. This makes lifting the whole slab out later feel like magic instead of a crumbly disaster.
- Mix the red velvet base:
- Whisk melted butter and sugar until smooth, then beat in eggs, vanilla, and red coloring until the batter looks like liquid velvet. Sift in flour, cocoa, and salt, folding gently just until combined because overmixing kills that fudgy texture.
- Reserve batter for swirling:
- Scoop out 1/4 cup of the red batter and set it aside in a small bowl. Spread the rest evenly in your prepared pan, smoothing it with a spatula so the cheesecake layer sits flat.
- Make the cheesecake layer:
- Beat softened cream cheese until it's completely smooth, then add sugar, egg, and vanilla, mixing until creamy and lump-free. Pour this over the red velvet base and spread it gently to the edges.
- Create the swirl:
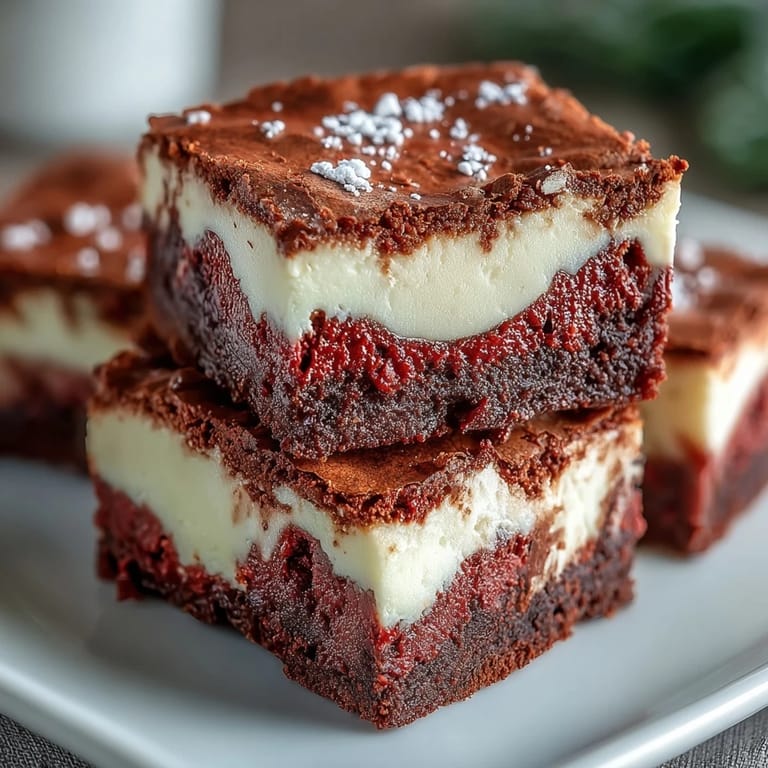
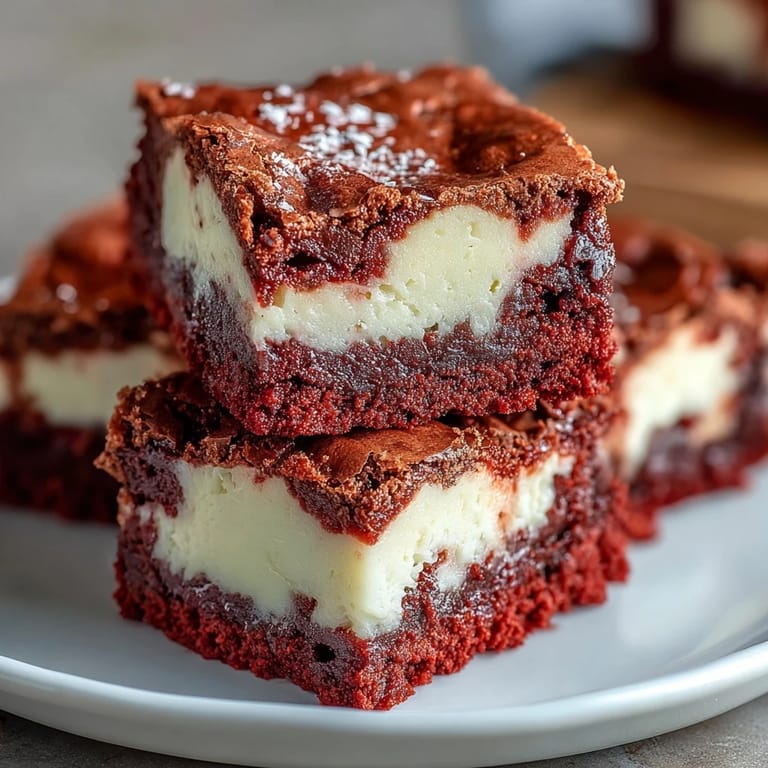
- Dollop spoonfuls of the reserved red batter on top of the cheesecake, then drag a knife or skewer through in gentle waves. Don't overthink it, random swirls always look better than perfect ones.
- Bake until just set:
- Slide the pan into the oven for 35 minutes, checking that the center jiggles only slightly and a toothpick comes out with moist crumbs. Overbaking turns them dry, so pull them out even if you're nervous.
- Cool and chill:
- Let the pan cool completely on a wire rack, then refrigerate for at least 2 hours before slicing. Cold brownies cut cleaner, and the flavors meld into something even more indulgent.
 Pin It
 One winter evening, I made these for a small dinner party and forgot to chill them long enough. We ate them with forks straight from the pan, cheesecake oozing everywhere, and nobody minded one bit. Sometimes the imperfect moments taste just as good, and that night reminded me that recipes are just guidelines for gathering people around something sweet.
Storage and Make-Ahead Tips
These brownies keep beautifully in an airtight container in the fridge for up to five days, and honestly, they taste even better on day two when the flavors have settled. I've also wrapped individual squares in plastic wrap and frozen them for up to a month, pulling one out whenever I need a quick fix. Just let them thaw in the fridge overnight, and they're as fudgy as the day they were baked.
Customization Ideas
I've stirred white chocolate chips into the brownie batter before spreading it, and the pockets of melted sweetness are a revelation. A friend of mine swirls in raspberry jam alongside the red velvet for a fruity twist, and another dusts the top with powdered sugar before serving for a snowy, elegant look. The base recipe is forgiving enough to handle your wildest ideas, so don't be afraid to experiment.
Serving Suggestions
I love serving these cold, straight from the fridge, with a mug of black coffee that cuts through the richness. For parties, I'll stack them on a cake stand with a light dusting of cocoa powder, and they disappear faster than anything else on the table. A dollop of whipped cream on the side never hurts either, especially if you're feeling fancy.
- Pair with vanilla ice cream for a contrast in temperature and texture that feels like a hug.
- Drizzle with melted dark chocolate if you want to push the decadence even further.
- Garnish with fresh raspberries for a pop of color and a tart counterpoint to the sweetness.
 Pin It
 These brownies have a way of turning any ordinary day into something worth celebrating, whether you're baking them for a crowd or sneaking a square at midnight. I hope they bring you as much joy as they've brought me, one fudgy, swirled bite at a time.
Recipe Questions & Answers
- → Can I use natural food coloring instead of artificial dye?
Yes, you can substitute natural red food coloring, though the color may be less vibrant. Beet powder is a popular natural alternative, but may require more quantity to achieve the signature red hue.
- → Why do my brownies need to be refrigerated before cutting?
Refrigerating allows the cheesecake layer to fully set, making it much easier to cut clean, professional-looking squares. The cold temperature also helps the brownies hold their shape and enhances the fudgy texture.
- → Can I make these brownies ahead of time?
Absolutely! These brownies actually taste better the next day as the flavors meld together. Store them in an airtight container in the refrigerator for up to 5 days, or freeze for up to 3 months.
- → What's the best way to create the swirl pattern?
After dolloping the reserved red velvet batter on top of the cheesecake layer, use a butter knife or wooden skewer to drag through both layers in a figure-eight or zigzag motion. Don't over-swirl or the layers will blend too much.
- → How do I know when the brownies are done baking?
The center should be just set and slightly jiggly, not liquid. A toothpick inserted should come out with a few moist crumbs—not wet batter, but not completely clean either. Overbaking will result in dry brownies.
- → Can I double this for a larger pan?
Yes, you can double the ingredients and use a 9x13-inch pan. The baking time may need to increase by 5-10 minutes. Check for doneness using the toothpick test around the 40-minute mark.