 Pin It
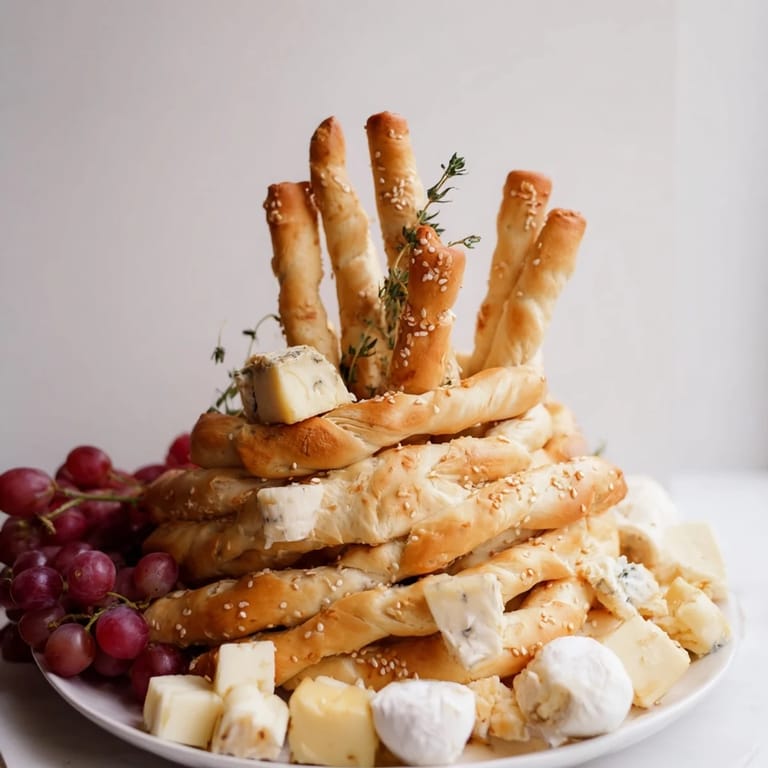
 The first time I built The Gilded Cage, I was nervous in a way that surprised me. It wasn't the dough or the cheeses—it was the moment I realized I was making something that looked like edible architecture, something that required just enough precision to feel special but enough imperfection to stay human. My hands were warm from working the dough, and I could smell the yeast doing its quiet work. When those golden breadsticks came out of the oven and I began arranging them into a dome, something clicked. This wasn't just appetizers; it was a moment of showing up for people.
I made this for a dinner party where someone brought a bottle of champagne and the conversation went exactly nowhere for the first ten minutes. Then I walked out with The Gilded Cage, and everything shifted. People leaned forward. They asked questions. They slowed down. Somehow, arranging fancy cheeses inside homemade breadsticks became permission to linger.
Ingredients
- All-purpose flour: The foundation—choose a reliable brand you trust, and avoid measuring by scooping straight from the bag, which packs it down and throws off your ratios.
- Instant dry yeast: This needs warmth to wake up, so cold water will cost you thirty minutes of lost time; lukewarm means it should feel like bathwater on your wrist.
- Sugar: A teaspoon feeds the yeast and helps the breadsticks brown beautifully, so don't skip it even though it feels small.
- Fine sea salt: Don't use table salt here—the crystals are too fine and you'll end up with over-salted dough; sea salt dissolves more slowly and more evenly.
- Lukewarm water: Too hot kills the yeast; too cold and it'll never rise properly—aim for around 40°C if you have a thermometer, or test it on the inside of your wrist.
- Olive oil: This enriches the dough and helps the breadsticks stay tender inside while they crisp outside; good olive oil makes a real difference here.
- Egg yolk: The glaze that turns ordinary breadsticks into something glossy and burnished; brush it on gently so you don't deflate your work.
- Sesame seeds: Optional, but they add texture and a nutty whisper to each bite—I almost always use them.
- Triple-cream Brie: Soft and yielding, it's the gentle anchor of your cheese board; cube it just before serving so it stays defined.
- Aged Comté: Nutty and slightly crystalline, this is where complexity lives; aged at least twelve months if you can find it.
- Truffled goat cheese: This is your moment to be luxurious—shape it into small balls and chill them so they hold their form when surrounded by breadsticks.
- Blue cheese: Crumble it coarsely; it should feel bold and unapologetic, a flavor wake-up call among milder friends.
- Parmigiano Reggiano: Use a vegetable peeler to create thin shards—they look more refined than grated cheese and melt on the tongue differently.
- Seedless red grapes: They offer brightness and a cool burst against warm bread; they're there as much for color as for taste.
- Honey or fig jam: A bridge between savory and sweet, something to dip breadsticks into or spread on Brie—fig jam is the more sophisticated choice, but honey feels more generous.
- Fresh herbs: Thyme and rosemary scattered on top add aroma and a whisper of something that says you've thought about every detail.
Tired of Takeout? 🥡
Get 10 meals you can make faster than delivery arrives. Seriously.
One email. No spam. Unsubscribe anytime.
Instructions
- Mix your foundation:
- In a large bowl, combine the flour, yeast, sugar, and salt. The dry ingredients should be evenly distributed—if you see pockets of salt, mix them in by hand. Add the lukewarm water and olive oil, stirring until everything just comes together into a shaggy, messy dough.
- Knead until it becomes silk:
- Transfer to a clean counter and knead for 8–10 minutes, pressing with the heel of your hand, folding the dough back over itself, rotating a quarter turn, and repeating. You'll feel it transform from rough to smooth; it should be soft and elastic, not sticky. When you poke it, it should spring back partway.
- Let it breathe and grow:
- Return the dough to a lightly oiled bowl, cover it with a damp cloth or plastic wrap, and place it somewhere warm—near a sunny window, on top of the fridge, or in a cool oven with the light on. In about 30 minutes, it should double in size. Press two fingers into it; if the impression stays, it's ready.
- Heat and prepare:
- Preheat your oven to 200°C (390°F) and line a baking tray with parchment paper. This keeps cleanup to a whisper and prevents sticking.
- Divide and roll:
- Turn the risen dough onto a lightly floured counter and divide it into 18–20 roughly equal pieces. Roll each piece between your palms and the counter into a thin stick about 3 mm thick and 25 cm long—thin enough to be elegant, thick enough to support the dome. It's okay if they're not perfectly uniform; character matters more than perfection.
- Glaze and garnish:
- Arrange the breadsticks on the prepared tray, spacing them slightly apart. Lightly brush each one with egg yolk using a pastry brush, then sprinkle sesame seeds if you're using them. The egg yolk gives them that deep golden finish that catches the light.
- Bake until golden and crisp:
- Bake for 15–18 minutes, turning the tray and gently flipping the breadsticks halfway through so they brown evenly on both sides. They're done when they sound hollow when you tap them. Cool them completely on the tray or a wire rack—don't skip this step or they'll trap steam and lose their crispness.
- Arrange your treasure:
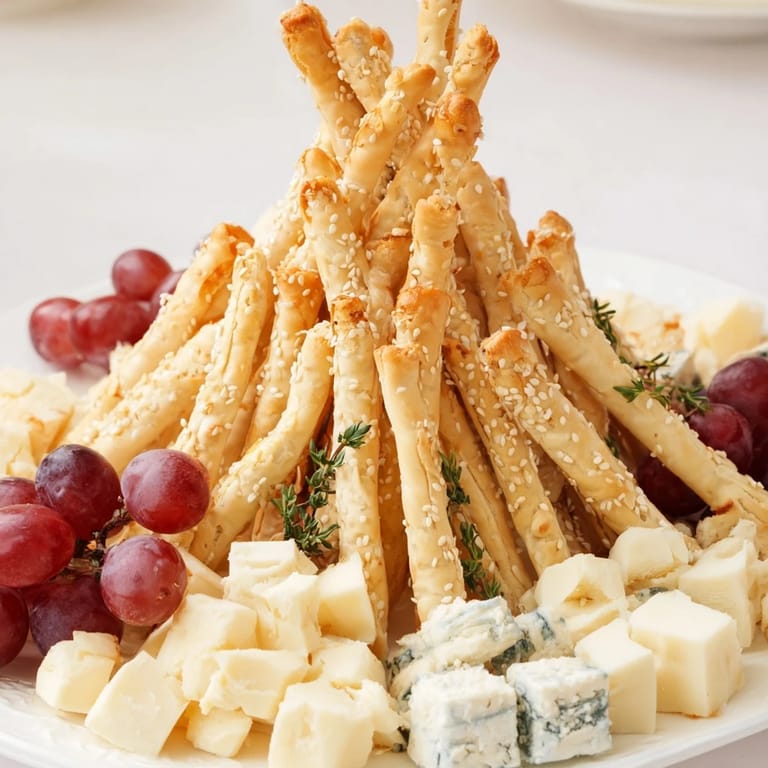
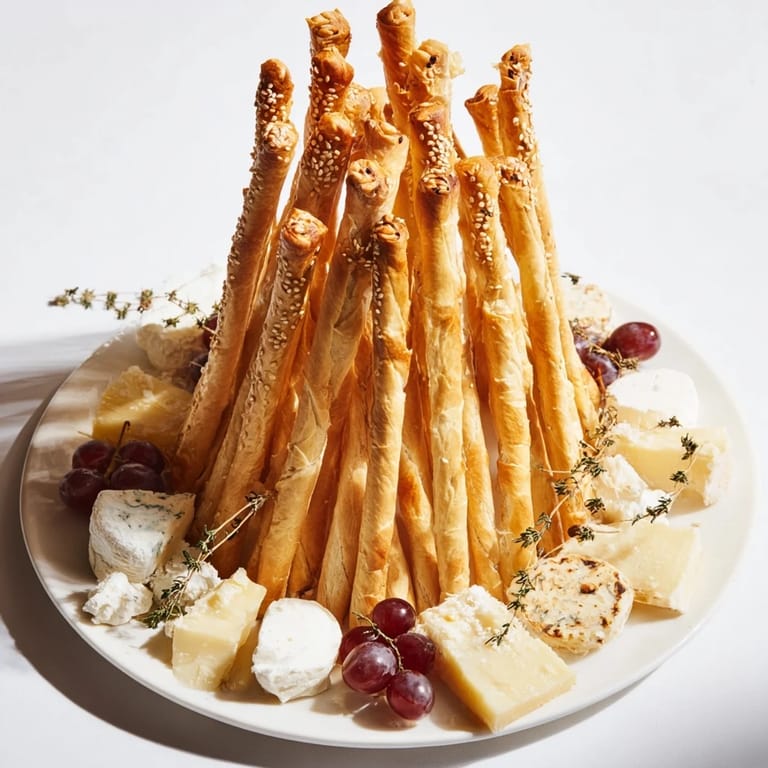
- On a serving platter, build a mound with all your cheeses in the center—position the Brie cubes and Comté together, scatter the crumbled blue cheese, add the goat cheese balls, and top with shaved Parmigiano. Tuck grapes into the gaps, drizzle honey or jam nearby, and scatter fresh herbs over everything for aroma and color.
- Build the dome:
- This is where the magic happens. Gently lean the breadsticks against the cheese mound, creating a dome shape. If they slip, press them slightly into the cheese for grip, or use a small ovenproof bowl as a temporary mold while you're assembling—remove it once the structure is stable. The breadsticks should lean inward, creating that elegant cage. It takes patience and a light touch, but it's far easier than it looks.
 Pin It
 What I love most is watching someone navigate this dish for the first time. They pause, considering where to start, then carefully remove a breadstick to access a cheese they want. There's an intimacy in a shared platter that spreads and wine at a table don't always give you—everyone's reaching toward the same beautiful thing, and somehow that creates conversation.
Why This Works as Theater
The Gilded Cage is almost more about the moment of serving than the actual eating, and that's not a flaw—it's the whole point. When people see edible architecture, they slow down. They photograph it. They ask questions about where it came from. You're not just serving appetizers; you're creating a pause, a shared wonder, something they'll remember about the evening. That combination of homemade craftsmanship and genuine luxury is rare enough to feel special, but approachable enough that you don't feel fraudulent making it.
Cheese Selection as Personal Signature
The cheeses I've listed are a starting point, not a law. Triple-cream Brie could become a creamy Taleggio. Aged Comté could be aged Manchego or Gruyère. The blue cheese could be Gorgonzola or Stilton. What matters is balance—you want soft, hard, pungent, mild, and savory elements all talking to each other. When you choose your own cheeses, you're also choosing who you're inviting to your table and what conversations you want to have. I've learned that the best boards are the ones that feel intentional without feeling precious.
The Final Flourishes
Edible gold leaf, if you're feeling particularly theatrical, turns breadsticks into something that catches candlelight. A few leaves pressed onto the glaze before baking catch the light without looking overdone. Some people think that's too much; I think food is partly about joy, and joy sometimes deserves a little gold.
- Make sure your breadsticks are completely cool before building the dome, or steam rising from them will wilt the herbs and soften the crisp.
- If you're worried about stability, remember that you can always bake the breadsticks a day ahead and assemble the whole structure just before guests arrive—the breadsticks will actually stay crisper if they're at room temperature.
- Champagne or a crisp white wine isn't just a suggestion; it's the conversation partner this dish was made for.
 Pin It
 This is the kind of dish that reminds you why you cook in the first place. It's beautiful enough to impress, but simple enough to feel joyful, and somehow in that balance, it becomes something people talk about long after the last breadstick is gone.
Recipe Questions & Answers
- → How do I shape the breadsticks evenly?
Divide the dough into small pieces and roll each into thin sticks about 3 mm thick and 25 cm long for consistent baking.
- → Can I use different cheeses for this dish?
Absolutely. Substitute other creamy or aged cheeses like aged cheddar, Manchego, or Taleggio to suit your taste.
- → What is the best way to assemble the breadsticks dome?
Arrange cheeses in a mound on a platter, then carefully build the breadsticks around and over them, pressing gently for stability.
- → Are there any tips for ensuring the breadsticks stay crisp?
Bake until golden and cool completely before assembly to maintain crispness and prevent sogginess.
- → What pairings complement this dish well?
Serve alongside crisp white wine or Champagne to enhance the flavors and balance the richness.